-
Posts
10306 -
Joined
-
Last visited
-
Days Won
1
Content Type
Profiles
Forums
Gallery
Everything posted by Dan6061
-
I had to sit and play spot the difference. Looks well nice. I like Ashton's.
-
Basically a 26" Crawler. Looks wise anyway, bet it's a crappy compound like the Tioga Factory's...
-
I did crack the bashplate mount, but it's not there anymore. I dunno how much it weighs, never bothered to weigh it. It's obviously lighter than when I first got it, but it's still heavier than most frames out there. But meh, doesn't bother me, as it's strong as!
-
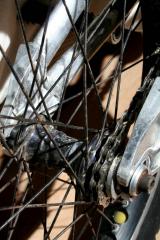
They're the same as Profile's. Put one of the bolts in the non-drive side, and start to tap it with a mallet. This will push the axle through the body, and push off the end cap of the axle on the otherside. Then you'll have the axle, with a hub shell bearing, and driver etc on it. Now you need to get the drive off, just open up a vice so the cog fits on top, and put the other bolt in the axle, and tap it with the mallet. This then pushes the axle the other way so everything comes off. Now it's all in bits, and you can start taking the pawls and springs out of the driver body (remember which way they go!*) Now clean up the bearing, just wipe any grease/oil off it with some kitchen roll. Slot the axle through the drive side (give it a clean first), so it sits in place through the hub bearing still in the hubshell, now get the other hubshell bearing, and slide it down. With alll the pawls and springs out of the drive body, slide that onto the axle, and gently tap it down so the bearing sits nicely in place in the hubshell. Using the driver keeps the bearing nice and flush, and having the pawls and springs out stops you from breaking stuff. You should have the axle sat firmly in place between the bearings. Now just clean up inside the ratchet, and clean all the springs and pawls, and then the driver body too. Now it's time to put the pawls and springs back in place. * It's vital that you remembered which way they go, because otherwise you'll have it all in the wrong way and it won't engage. I find it's easier to slot the spring in first, then the pawl goes on second. It's kinda fiddley, but you'll manage it. Once they're all in, spin the driver so it'll click as it goes round (anti-clockwise?) as it spins, start pushing it down. This should start engaging the pawls so they'll stay in the ratchet. Once that's in, just get the end caps for the axle, and press them on (tap them with the mallet too) Now when you put it in the frame and tighten it up, the end caps will then be firmly pressed in place, and you're done! You can put some thin oil on the pawls and springs before you put the driver in, something like Finishline oil is perfect. But I've ran my Profile dry since I've had it and it doesn't skip. (Only when the bearings break!) EDIT: Forgot to mention! On Profile's there's a small washer that goes between the hubshell and the driver, not sure if you get them in ProII's but keep an eye out for it if there is one. You'll need to put that in before you slot the driver in, otherwise the driver won't spin when you put it all back together!
-
I'd first soak it in WD40, then get some big mole grips and try my best to undo it. Sounds like the bolt's at the bottom of the thread, so it's been forced against the bottom of the frame, so it's wedged. Get a slightly bigger spacer for the next bolt. - I found that the rollers our of KMC Kool chains are perfect size.
-
Nothing wrong with that tyre! Still grips on stuff, nice to roll about on.. it's fiiiiine.
-
It's finished at the moment... Was thinking about drilling out the dropouts to make it look a bit nicer... When I get money again i'm getting new pedals, and a new stem, seeing as both clamp threads have stripped in it, and I need a change from that Team stem.
-
I meant I stripped the threads... go away. They're Echo Lite forks, the '06 ones that had the Magura mounts on the front, but not anymore.
-
I'm liking that! Polish it though, then it'll almost be as nice as my bike.
-
Ah wow, really? I'm quite chuffed. haha. I just threaded one of the spring adjuster threads on the Ultimate, so I can't ride until I get a new one. Thanks for all the comments though, I swear everyone always likes my bike.
-
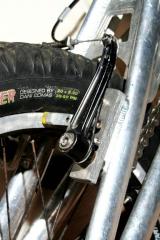
My mate has a big polish spinny machine..thing. Used that for ages to get most of the scratches out, then finished it off with Autosol (black and gold tube) and a cloth. Edd Potts first made me some adapters, but they sat too low down, so I used the bolt on brake lugs, and made my own plates for them. Kinda bodged up, but they hold the brake on, so they'll do!
-
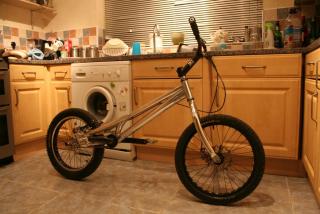
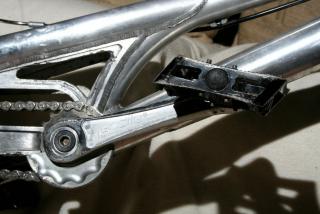
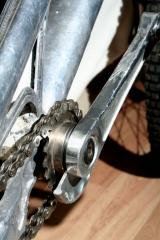
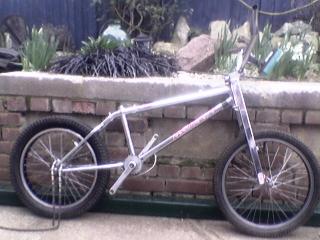
Polished my frame and forks at my mates. Cut off the 4 bolt mounts on the forks, and smoothed it out. Also cut off one of the inner triangle bits of my frame to save a bit of weight, and because I was bored. I'll get better pictures tomorrow! UPDATE! Tensile cranks, Monty PR Stem, and now half a bash. - Which is now silver. Not long until it's next update...
-
I might be up for this... Depending on if I can get there, and if my bike's working properly.
-
^^ My mate has one of them too! Still has the Magura's, with the factory bleeds in them! haha. We called it the Table-Mag, as it looks like it was made out of old table legs.
-
-
Probably the actual computer freezing, not the cursor. Stop playing games!
-
How? 2" off stock, 4" off mod. Go figure.
-
I don't see how this idea will catch on... If you wanted it, then you'd either have to buy a new rim with the rotor attached, or drill into your rim to fit the disc. Then if you wanted to go back to rim brakes you'll be stuck with holes all over the sidewalls... Think i'll stick to my V and BB7.
-
I hate you for passing. I've failed 3 times. Only in the 2nd one could I see my mistake, forgot about blind spots 4 times, so I got a major. The 1st and 3rd I had women examiners, which were total bitches. Both of which made false assumptions and braked when they didn't need to.
-
Hub bearings - 6903 Driver Bearings - 6802 For a complete set (one hub) you'll need 2 hub shell bearings, and 4 driver bearings. EDIT: Pretty much posted the exact same thing a few months ago (scroll up) haha.
-
What length cranks do you have? If they're 170mm, then you have the perfect ratio really...
-
Get some pictures! I wanna see this 'massive' dent...
-
I hope you let it bed in, then cleaned it out etc before welding it up... Otherwise bye bye face!
-
Mod - 20" 24" Stock - 26" It doesn't 'come under' anything, really. Apart from 24".


