-
Posts
717 -
Joined
-
Last visited
-
Days Won
1
Content Type
Profiles
Forums
Gallery
Everything posted by Rob Leech
-
How do all, we're doing our normal Leicester saturday ride, just wondering if anyone else wanted to attend? Will be at the courts at 11 as the norm . Cheers, Josh.
-
Would get it shot blasted my self maybe glass beads? cheap, soft on the material and eco friendly for all who care. Pretty sure that this is a surface prep before anodizing, either shot blast or chemical etching. If you look at the Bjorn frame (still cant spell i think ), the graphics are nice and smooth where as the rest of the frame has the grainy affect your talking about . Bit of a pointless post really, but thought id share the knowledge. Cheers, Josh.
-

Second Frame Build- Seventh And Final Update For A While
Rob Leech replied to Rob Leech's topic in Bike Pictures
Nah, i've made this one so it can be set up for any frame really, the only thing i need to make for it to assemble mods is an adjustable axle to suit 116mm, but i'll leave that until i start on a mod like . Cheers, Josh. Oh, and set the center for the head tube aswell -

Second Frame Build- Seventh And Final Update For A While
Rob Leech replied to Rob Leech's topic in Bike Pictures
Go for it pal, its not actually all that hard to do. I found that the joint prep on the tubing was the biggest problem so have a few practice runs making up some branches and welding them up . Cheers, Josh. -

Second Frame Build- Seventh And Final Update For A While
Rob Leech replied to Rob Leech's topic in Bike Pictures
Not sure yet, im gona look at the weight once it's finished, but one of the other 2 frames will have some carbon additions . Hopefully, yeah, booster and maybe some gusseting connecting the seat tube and chainstays, but i haven't come to a final decision yet . Will be an update on the jig in a mo . Cheers, Josh. -

Second Frame Build- Seventh And Final Update For A While
Rob Leech replied to Rob Leech's topic in Bike Pictures
I looked at that and read pre welding heat treatment then . It will more than likely be going off to a heat treatment company in Northampton that specialize in aluminum alloys to go through solution hardening and (more than likely artificial) age hardening processes, as i simply don't have the kit to carry out the solution hardening . Took me quite a while to find like, but luckily enough, there are quite a few places in the midlands that i could send it to. Cheers, Josh. Oh, and will hopefully be going off to anodizing afterwards, once i sort out surface finishes and designs . -

Second Frame Build- Seventh And Final Update For A While
Rob Leech replied to Rob Leech's topic in Bike Pictures
A little bit, aye. I did want it quite close at the bottom when i started, but probably not that close We all learn from our mistakes. No bends or anything in these though, quite simple and minimalist i think Cheers, Josh. -
Go for it, should sort it out . Josh.
-

Second Frame Build- Seventh And Final Update For A While
Rob Leech replied to Rob Leech's topic in Bike Pictures
Indeed Still working on the jig, so probably wont be another update for a few days . Josh. -

Second Frame Build- Seventh And Final Update For A While
Rob Leech replied to Rob Leech's topic in Bike Pictures
Cheers matey, This is one of the reason for the jig, I've designed it so that it will be able to take the smallest mods or the largest stocks, so we'll see. And i have got enough material to make 2 or 3 frames this time, so a mod might well be on the list . Cheers, Josh. -
How do, maybe look at a longer BB? What size have you got in atm? Cheers, Josh.
-

Second Frame Build- Seventh And Final Update For A While
Rob Leech replied to Rob Leech's topic in Bike Pictures
Yeah buddy, we'll show atkins how it goes down, JAF styley. -

Second Frame Build- Seventh And Final Update For A While
Rob Leech replied to Rob Leech's topic in Bike Pictures
I'm fully coded in ally tig . The good majority of my work is training people in the engineering industry and helping them to gain qualifications in welding . Cheers matey, Josh. -
Awsomeness. Love it how he's annoyed with himself in this one . Josh.
-
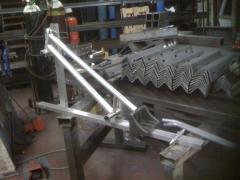
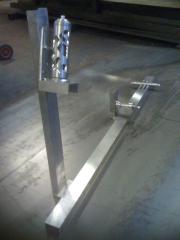
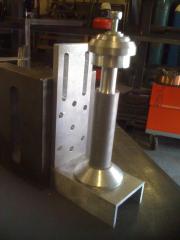
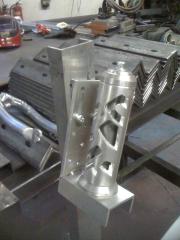
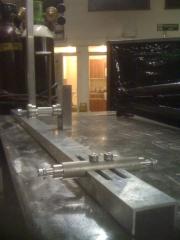
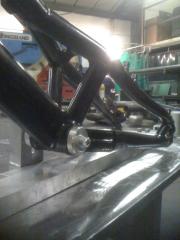
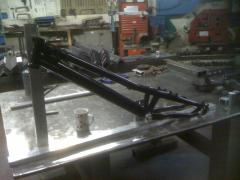
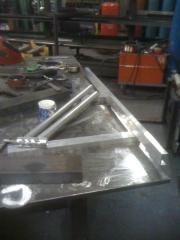
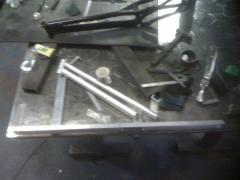
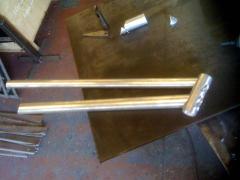
How do all, I've got another one for you. After riding the first frame for just 1 ride, i found that i should of used thinner tubing, turned out a bit heavy. So, after a bit of looking around and some research, I've decided to delve into aluminum. Here are some pics of how far I've gotten this week, this one will take a little bit longer as I'm also making a fully adjustable jig so i can start looking at getting a few frames made up. Let me know what you think. Headtube, something a bit different, as usual- Top tube and down tube ready for assembly- Jig so far- sorry for the picture quality, i will get a decent camera soon- Also, if anyone has any ideas of their own that they'd like too see come to light, please get in touch, would love too see what other people have in mind. Bit of an update on the jig, thought you lot would like to see it coming together- The frame in the pics is an old Ozonys cannibal, just using it to show how it all fits in like. Rightey o, time for another update. Finished the jig now, have just got to sort out clamping for the tubing, started on the chainstays and seatstyas this evening, so should start to come together next week . This isn't how its going to be set up btw, down tube isn't the right length for this frame and the bb is actually a spare steel headtube, just sorta thrown it together to see how it looked . Oh, and the holes in the headtube clamp are because of a quick change in design. Time for a little update- Haven't been able to get on this for very long lately, other commitments have taken over, ie, work . Got a couple of bits done today i thought you lot would like to see- Not the tidiest machining, but will do for now. Rightey o, had a bit of spare time in the shop today, so thought i'd crack on with the frame, this is where i got to. Got the frame tacked and got a few welds down on it today, thought you lot would like to see it- Shown with mod forks there, but is a stock . Bought some digital scales today as well, so will get the weight up tomorrow. Will hopefully have all the gussets and bits sorted by the end of the week Got the frame fully welded, minus brake mounts and gussets today, weight when tacked up was 1.28kg, fully welded- 1.32, so should be looking at around 1.4ish when its complete . Not proud of the welding though, bit out of practice on tube, but it'd definately hold your trousers up . Got the gussets on today, only brake mounts and booster to go, then off to heat treatment- Ok, just spent a while on the old girl, had to make a slight alteration due to tyre clearance problems, but i think its more of an improvement- Seems to be a bit stiffer at the back now, and has shed a mighty 110g off the weight, lol, which i dont understand as the material i put on was slighty thicker then the material i removed . Also assembled it partly to have a look at what the outcome will be, so feast your eyes on the second JaF frame- Hope you all like it, i'm quite fond of it . This will be the last update until the new year, as there's not alot more that i can do that will be interesting until after heat treatment and anodising . Let me know what you think. Cheers, Josh.


