ben_travis
-
Posts
6451 -
Joined
-
Last visited
-
Days Won
66
Recent Profile Visitors
25614 profile views


ben_travis's Achievements
Thats Enough Now Tart (8/9)
1.2k
Reputation
-
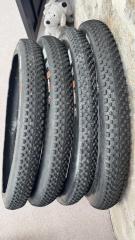
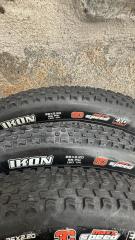
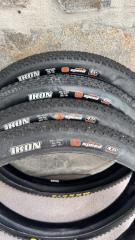
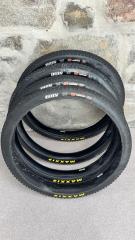
Maxxis ikons
-
-
Is 19 years since the last post a new record?
-
A quick google gives all you probably need on this (see below). However, personally, the fact you only need a small tool to tighten up a 6 bolt rotor would sway me to stick to those rotors. There are plenty of strong, thick rotors available now that will give you more than ample power for trials IMO 6-Bolt vs. CenterlockRotors 6-Bolt Rotor A 6-bolt rotor attaches to the hub using six bolts arranged in a circular pattern around the center of the rotor. These bolts secure the rotor firmly to the hub, ensuring that it rotates with the wheel. The 6-bolt rotor system is widely adopted across various types of bicycles, including mountain bikes, road bikes, and gravel bikes. It offers versatility and compatibility with a broad range of hubs and brake systems, allowing cyclists to choose from various rotor sizes and designs offered by different manufacturers. Installation and replacement of 6-bolt rotors are typically straightforward, requiring basic tools to tighten the bolts evenly. Advantages Widely Compatible: 6-bolt rotors are highly compatible with a broad range of hubs and brake systems, making them a versatile choice across different cycling disciplines and bike setups. This compatibility ensures that cyclists have numerous options for integrating 6-bolt rotors into their bikes without compatibility concerns. Availability: They are widely available from numerous manufacturers and brands in various sizes and designs. Cyclists have ample choices for customization, whether they need specific rotor diameters or prefer particular rotor designs (such as vented or lightweight options). Ease of Installation: Installing or replacing 6-bolt rotors is straightforward and typically requires basic tools, such as an Allen key or torque wrench, to secure the bolts evenly. This ease of installation simplifies maintenance tasks for cyclists who prefer to service their own bikes or make quick adjustments on the go. Disadvantages Alignment Issues: Achieving perfect alignment when installing 6-bolt rotors can sometimes be challenging, especially when changing rotors or wheelsets. Misalignment can lead to brake rub, where the brake pads make unwanted contact with the rotor, causing noise and potentially affecting braking performance. Careful adjustment and attention to rotor positioning are necessary to avoid these issues. Weight: Compared to Centerlock rotor systems, the 6-bolt system tends to be slightly heavier. This additional weight is primarily due to the presence of six bolts and the corresponding rotor design. While the weight difference may be marginal, it can be a consideration for cyclists focused on minimizing overall bike weight, especially in competitive cycling. (Source: SJS CYCLES) Centerlock Rotor: A Centerlock rotor system is an alternative disc brake rotor mounting standard that uses a splined interface to attach the rotor to the hub. Unlike the 6-bolt system, which uses individual bolts, Centerlock rotors feature a spline interface onto which the rotor slides onto the hub. A lockring secures the rotor in place, typically using a specific tool like a cassette lockring tool. Centerlock rotors are known for their easy and quick installation and removal process, requiring only one tool to secure or release the rotor. This system often results in weight savings compared to 6-bolt rotors due to the simplified interface design and fewer parts involved. While not as universally adopted as the 6-bolt standard, Centerlock rotors offer advantages in terms of convenience, especially for riders who frequently swap or service their disc brake rotors. They are commonly found on high-end mountain bikes, gravel bikes, and road bikes, providing a streamlined and efficient braking solution. Centerlock rotors are found with two types of lockrings: External Lockring: This is the standard lockring used for most Centerlock rotors. It is a threaded ring that secures the rotor onto the splined interface of the hub. External lockrings often require a specific tool, such as a cassette lockring tool, for installation and removal. Internal Lockring (XTR Standard): Shimano introduced a proprietary internal lockring design known as the XTR standard. This internal lockring is recessed within the hub interface and requires a different tool for installation and removal compared to the external lockring. It is designed to provide a cleaner look and potentially reduce weight, but it is less common and may not be compatible with all Centerlock hubs. Advantages Easy Installation: Centerlock rotors are renowned for their quick and straightforward installation process. They require only one tool—a lockring tool (often similar to a cassette lockring tool)—to securely mount or remove the rotor from the hub. This simplicity reduces installation time and can be advantageous for cyclists who frequently swap wheels or perform maintenance. Weight Savings: Centerlock rotor systems often weigh less than their 6-bolt counterparts. The streamlined interface design and elimination of individual bolts contribute to these weight savings, making Centerlock rotors appealing for riders seeking to reduce rotational mass without sacrificing performance. Cleaner Appearance: The Centerlock design offers a cleaner aesthetic compared to 6-bolt rotors. With fewer external bolts or protrusions on the rotor surface, the Centerlock system provides a sleeker, more integrated look. This aesthetic appeal can be desirable for cyclists who prioritize the visual aspects of their bike’s components. Disadvantages Less Common: While Centerlock rotors are gaining popularity, they are not as universally adopted as 6-bolt rotors. This may limit compatibility options depending on the hub and brake system setup chosen by cyclists. Availability of Centerlock-compatible hubs and rotor options can vary compared to the extensive availability of 6-bolt components. Tool Dependency: Requiring a specific tool (lockring tool) for installation and removal can be a limitation if cyclists do not have access to this tool or prefer not to carry additional tools during rides or races. This tool dependency contrasts with the simpler tool requirements for installing 6-bolt rotors, which may influence some cyclists’ preferences
-
Yo dude, i've been running the conti cross king on my hex for a while now and really like it. I caveat this with the fact that I've only really run it at 30psi and above, so can't confirm how it'll act for pinches at lower pressures. Continental Cross King 2.3 Folding
-
Cheers @Nick G and @manuel! Glad you enjoyed it! I think that makes it official, Nick! I'll be holding you to it...
-
Thanks dude :). Appreciate it
-
Thanks Sam, Thanks Ad! Appreciate it, and glad to hear you enjoyed it.
-
Thanks guys! :-).
-
Thanks dudes! Glad to see people are enjoying it 🙂
-
Morning Guys, Turned 40 today (I know, I know, its a shock given I look at least 5 or 6 years older than that...), and as it's considered a biggy, I spent the year self filming clips to make an edit to celebrate. I have a love / hate relationship with filming edits, but I'm glad I stuck in as I'm pretty chuffed with this one. Spent ages trying to think of a title, and then found the 6 minute song you hear. I've mostly titled all my edits referencing the song name and this is no different. It resonated a lot as I definitely feel like I'm 'Hangin' On' given the level of riding in trials now-a-days. I still feel like I'm improving and learning new things, but I definitely feel it more than I used to after 28 years riding trials... Anyway, the full vid is below (and a left-overs video is underneath that) and I'd love to hear what you think. MAKE. EDITS. GREAT. AGAIN! Thanks for watching
- 17 replies
-
- 11
-

-
 Sorry for the delay, to confirm, to top of grip my bar height is 107cm, and yes, it is the hex in that video Hopefully it helps you out.
 -
Surely ‘effective stack’ is meaningless to compare bikes as so many factors can change the measurement (bar geo, stem geometry, stacker quantity / height, fork length, and lots of others that could technically change it). I could get a fourplay to have a similar effective stack as a raleigh burner if I put the correct components on it 🤷🏻♂️ This is why stack is taken from centre top of head tube, as less factors have an impact edit: to be slightly helpful, I will try and get you my bar height at somepoint
-
Aren't you sweet, Luke. Let me know your address and i'll get the cash down to you soon....
-
Light weight, and with a little modification, even lighter. Definitely helps with moves where the bike spins (FJWs, whips, spins etc) Tread pattern isn't too restricting for street riding Works tubeless Sidewalls are very thin, and really require to use higher pressures (i.e. 45psi +) unless you like changing inner tubes (or in my experience, buying a new tyre, because you tore the sidewall) Narrow profile isn't as reassuring as 2.4" in my experience