Alex Dark
-
Posts
7722 -
Joined
-
Last visited
-
Days Won
20
Content Type
Profiles
Forums
Gallery
Everything posted by Alex Dark
-
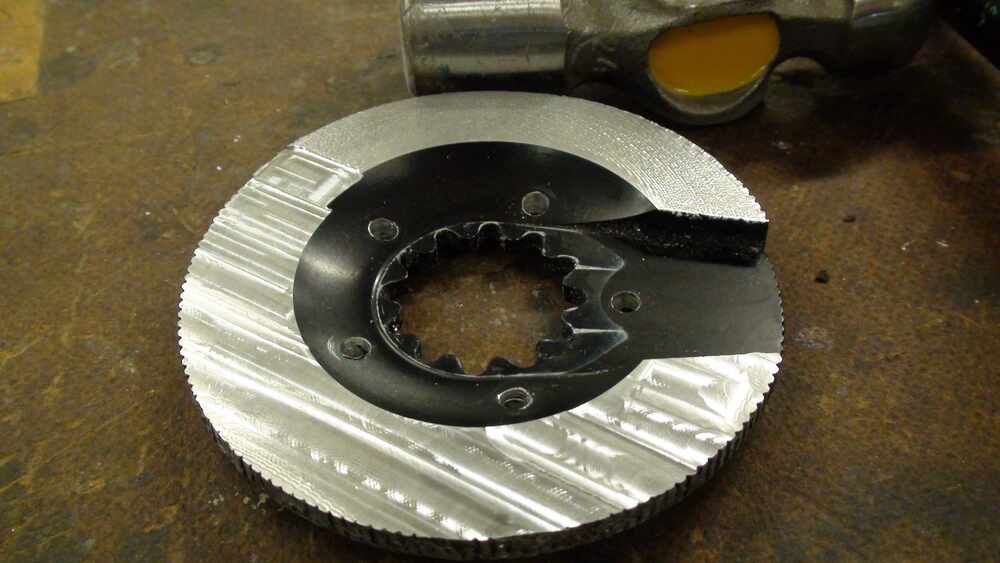
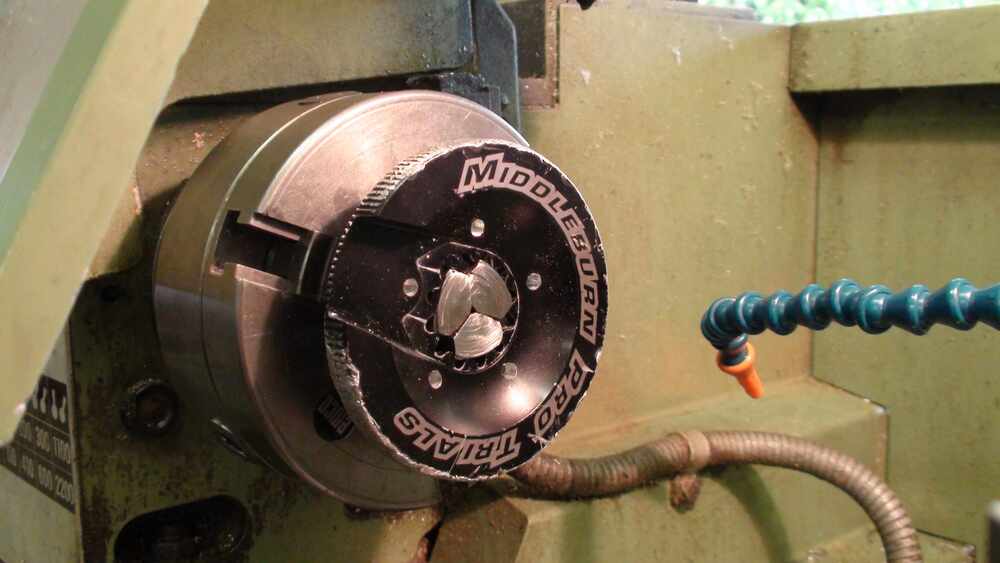
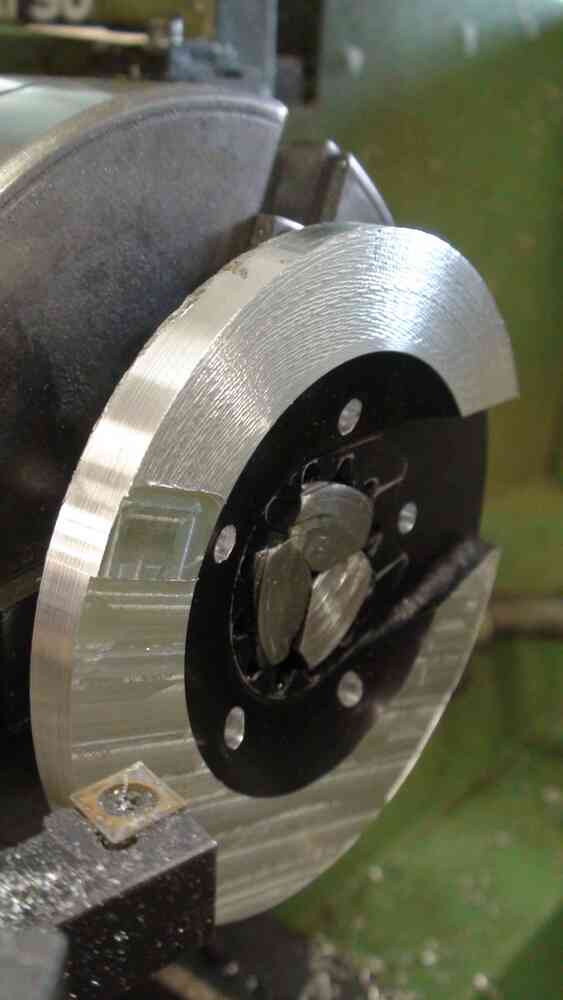
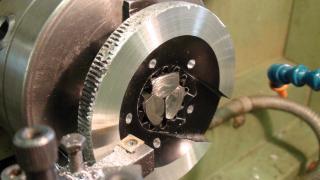
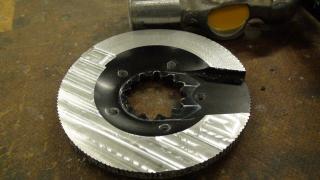
Righto! Got an update...decided to really get on it and nearly finished me little project. Used the lathe, mill, and pillar drill to get it sorted. Just need to do some cosmetic machining, and drill the cog and tap the bash. Super high (12.2 ) tensile bolts came in the post today, sooo I should have the whole thing on the bike and in testing by the weekend? Here's the bash before I buggered around with it...pretty bashed up but structurally gravy. Actual weight at this stage was: 223.7grams Just after lathing the first 2mm off Here it is after milling the other side down a bit more, 10mm thickness now. Milling the side down, decreasing the diameter from 104mm to 89.5mm to just cover the new 18t cog.


-
True your front wheel...practice everything on www.trashzen.com Damn straight, best way of doing it Just kill it, then replace with bits as needed.
-
Very fine sandpaper.....800 grit/1000....take o-ring off then evenly sand the piston down slightly. Rinse in water and try fitting. Always worked perfectly for me
-
Started on an x-ess too...if you learn the basics on that, then move to a trials specific rig...in my opinion you'll end up a better rider
-
Exactly what he says...but I prefer longer bikes. For instance, I'm 5 8" and my coust measures in at 1117, but only 670mm reach
-
I'd steer clear from try-all....
-
Ye get Luke out...haven't seen him in tiiiime
-
I has ideas....CAD model ahoy when I get home
-
YES...full fat is where it's at
-
Single wall the front rim at least...change tubes to lightish ones ( think Tesco ). Cut a headtube slot and bash mounts are both do able with a grinder and file to neaten...then trim every other knobble off the monty's when you get them too Changing to try-all cranks will save you 100g too. If you changed to say a t-pro frame that's 300g straight away... Grinder to cut the inner wall out...then file the burs back, then a heavy sandpaper to finish ( 60-80 grit ).
-
My thoughts exactly... true British shed engineering
-
Looks really nice, best one I've ever seen...although most people will disagree I love the way they ride > New bars, new forks and that's an acccce little bike.
-
The Hope Mono Trial is often wrongly referred to as the Hope mono (mini)....they are two very different brakes...one a street/dj/xc brake one pure trials. Easiest way to tell is the gold bore cap on the normal mono, or the smaller bore cap on the calliper. They both use the same Mini Lever however.
-
Haha funny how everyone gets so heated over a bloody alternative booster idea It may not work as well, but at least there's another option for some people, and with snazzy black clamps
-
Haha too true.... you should see some interesting bits and bobs on the project bike when I finally get it finished though!
-
It's more of a problem of the bolts interfering with the lockring...even with the cloud 9 the sprocket has to be removed before the actual bash, and thus lockring can... I have an excellent idea for another project now though
-
I certainly can I'll get some as it gets made anyway.... probably a video too. Yep quite possibly, depends on the diameter of their bolt holes....I suppose it would be 46mm like a standard disc hub? If so then maybe not....as the inner ring ( lockring ) on some burns is 42mm... It would nearly definitely work with a custom cnc'd / routered one however
-
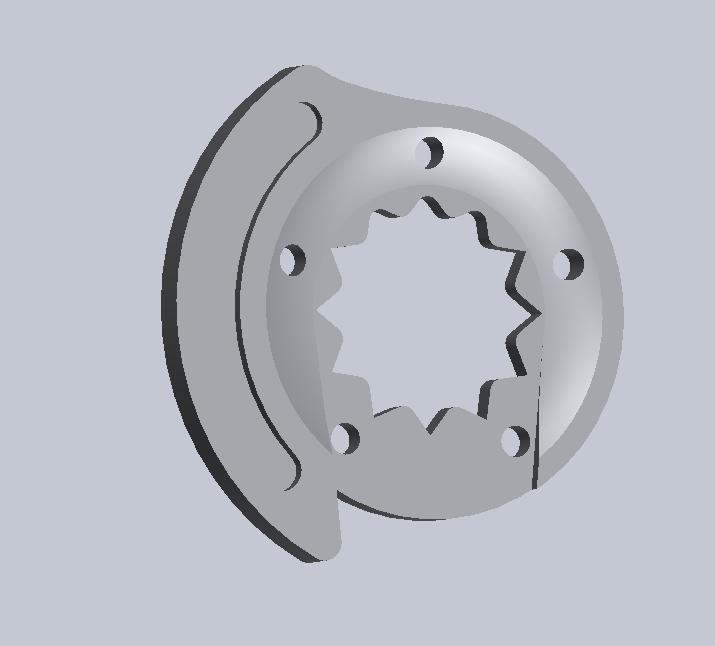
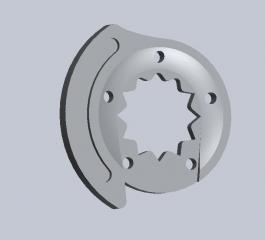
I'm just being cheap and drilling a standard 18t singlespeed cassette sprocket....but I'm sure I could find out where Steve gets his from...or London Fixie has some that were designed to take the IS disc mounting. That is very true Luke, like I said this is just a... 5 holes may as well put another 5 there as they fit nicely in between the spider If i ever made them I'd run 6 10.9 bolts probably. I'm not worried about the sproket giving out at all...after all disc rotors have massively more leverage, smaller bolts and shit loads of material removed from in between the holes E.g I'm definitely going to properly model this with a chain and sprockets as soon as I'm back at college if I've got enough time between doing end of year coursework Best case scenario is I'll have the first one finished and on the bike for a ride in Plymouth on Sunday where you can have a look if you wish Haha yeh it is pretty cool, love playing with the Mill and lathes to make this interesting shizzle Just aiming to make as much as possible for my project bike really, or at least modify it so I've put my own twist on it.
-
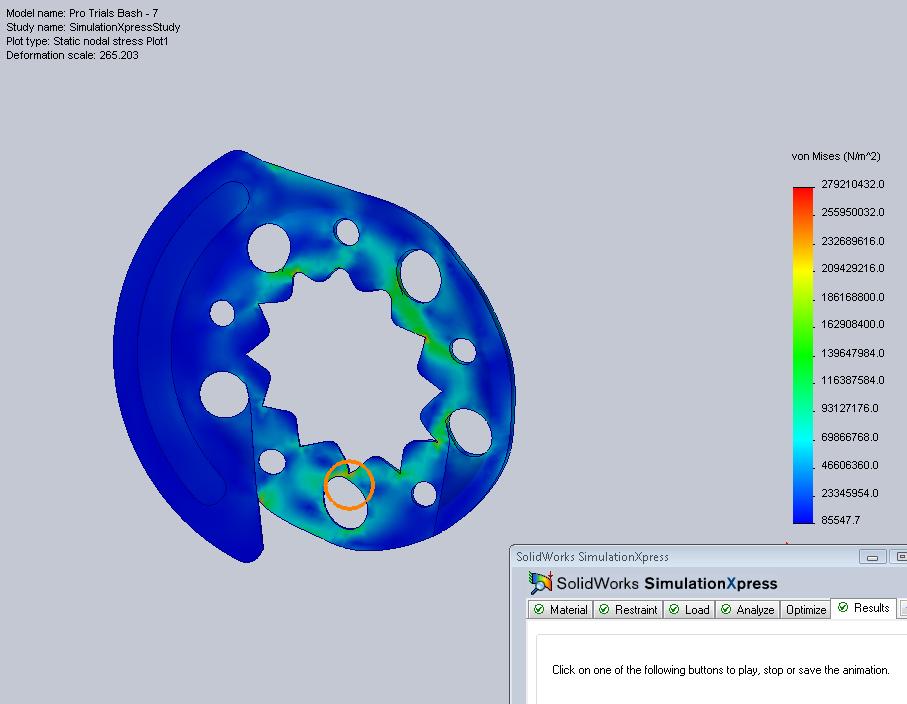
Fail....I can't stress test an assembly at home, but I can assure you nearly all the force is acting through the splines... Erm, I have this...but I don;t think it really shows anything as the crank isn't mounted, and the force is only perpendicular, not a cyclical torsional force. Got a picture below of the latest revision, but without the drilled holes, only the large scoop Cheers

-
Give me literally two mintues and I'll model one Without holes and with....
-
Hmm I suppose, although he bolts will be machined down so they aren't sticking out. The heatsink cloud9 uses the same m6 standard pitch bolts...and that never seems to be an issue? I appreciate they have more of them though I have a couple of other ideas, but I Guess the only way to find out is to test them really. I still have space to tap and thread 5 longer than usual chainring bolts through, so that's still an option. Any other comments please keep them coming I can model one in a mo...and yup less holey is no problem at all
-
RB designs lever...I think that version is the older style? Although you can get hold of them here : braking stuff Bikes look lush, incredible spec on all, pretty dengtastic. Gone are the days when that meant 11kg+ though Love the gold slate2 so much......really want one to replace the Coustellier
-
It's a definite possibility, I do have access to a CNC router that I could use The lockring fits fine actually, as the sprocket is spaced away from the cog. I'll show you a picture of the original actually drilled in real life Nope, tap straight into, but because of the scoop into the crank arm all the bolts can pass straight through. If this turns into an issue I may just have bolts going from the front side and neat little allen nuts on the t'other / normal chainring bolt style Sure If i can actually use the CNC router...which hopefully I wills and yep, that's no problem at all, I may change the design so it suits both anyway. Cheers man, appreciate the feedback from you all
-
Just do it...works well.
-
Interesting idea....I think I'd stick with roadie grip tape though, personally